

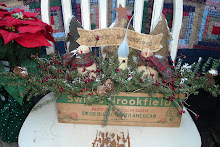
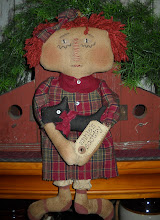
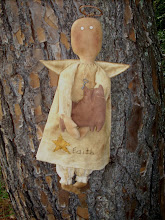
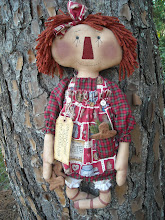
I am sorry it has taken so long to update. I am having trouble getting ahold of the winner of the bagholder, If any one knows Country Pickins please let me know how to get in touch with her. Or if you are reading this please email me at info@youarespecialpatterns.com. I don't think my emails have been getting through. Been working on some new stuff. I just finished a new Annie pattern, I am going to call her Annie's Snowman. She is a big girl. She is a little on the bright side, I used lots of reds on her. I have aloy\t of people ask wher I buy my yarn for my doll's hair. I buy it at Joann's. They have skeins of yarn that are perfect for raggedy's.

I have been asked how I stuff my doll's, I tried taking some pics, hopefully these will explain how I do it. I had to take myself stuffing, so hope they make sense.

I have my doll body sewn up, just have to turn it and then stuff it.

I use a chop stick, I grab some stuffing and kind of wrap it around the end of the chopstick and then stuff down into the leg or arm. Just keep adding a little at time until you get stuff firmly. I kind of flatten the stuffing down as I go. I just mash down on the outside and try to keep flat and from bunching out.


Next I stuff the body and head, I stuff with little bunches of stuffing. I use the stuffing in the green and white box at Walmart, not the polyfil, that is too soft, I can't stuff tight enough with it. Just keep pressing the doll body flat as you go with your hands, to keep it flat.

Do you ever get a wobbly neck, this is one trick I use to help keep the head from flopping too much,
take a stitch under the neck line, going from back to front with heavy thread.


After you have stitch back and forth a couple of times, knot off your thread, you will have an indentation there. Just continue to stuff around the body and stitch.


I like to fold the bottom seam up and stitch my doll's legs into the opening and whipstitch closed. I don't use a machine stitch across. Just have to be careful to keep the legs even at the bottom. I hope this helps a little, I have stuffed a ton of dolls over the years and I have noticed no one stuffs the same, the same doll can look so different depending on who stuffs it.
Tomorrow I will show you how to pinch stitch and the finished doll face.


.jpg)


.JPG)


I'm always amazed in how quickly you get your dolls stuffed! A lot of times, you'll have at least 4 dolls in the making and I'll have just one and you'll beat me every time with all of yours and I'm still stuffing away! Of course tho, my mouth is running the whole time too! But I do like to watch you while you're making your dolls. I would still like to watch you a few more times, in sewing on the yarn for the doll hair, the new way that you've been doing!
ReplyDeleteWow!!!! Thanks for the tips!!!! hugs carla
ReplyDeleteThank you so much for the instructions. I am planning on making a couple this weekend...hopefully!
ReplyDeleteThanks Sandy, I use the same stuffing because it holds up so well and doesn't "bounce"! I was wondering if anyone else uses the same one. I am going to try the trick for the wobbly necks...I was sticking a short dowel up the neck and stuffing around it but this is so much easier! Have a great week! Michelle
ReplyDeleteThanks so much Sandy for the stuffing lesson. I can't wait till you show how to do the faces. I've been wanting to learn that. Thanks for sharing the instructions on different crafting projects.
ReplyDeleteGlad that everything is working on the empty nest thing.
Take care,
Melanie
ohh I love the tip on putting a tight stich at the neck to keep the head from flopping over, a lot better than inserting a dowl LOL, I love your patterns & always love seeing the latest creations , I think I'm goign to have to have Annie & her snowman LoL she turned out fantastic!
ReplyDeleteHelen
Thanks for sharing your tip on making a tight stitch to keep the neck from being floppy. I also use the same stuffing from Walmart.
ReplyDelete~Cindy~
Thanks for the tip on fixin a floppy neck! I'm sure that's going to come in helpful!!
ReplyDeleteJudy
Thank you so much for sharing the stuffing techniques. I use the same stuffing and have used the dowell in the neck, but the stitch sounds so much easier - I will be trying it tomorrow. I really stress out over a floppy neck. I have used a stuffing fork, but it bunches it so tight the end result has a bump look and feel.
ReplyDeleteYou really give me motivation, if I feel lazy I can always log on your blog and read about your latest projects and in no time I am back to crafting and have a different outlook on the day.
Take care,
Maxi
I have tried using the stitch to keep the neck stable and it works - I do not stress out any more because the stitch holds everything in place. Thanks so much Sandy.
ReplyDelete