You Are Special Patterns

You Are Special Patterns
Click on banner to go to our website

Tuesday, November 2, 2010

Finally more e-patterns done

Sorry it has been so long on this blog. Being sick, sure limits what I can do. I did manage to get some of my lighted boxes done this past week. I have 3 big shows coming up and not enough inventory. the first set of boxes are from my #272 Winter Welcome light. I have had these boxes in my shed for several years.


Next I got 3 of my Christmas Blessings #284 also finished. These boxes always sell great at the shows.


I have the following patterns now in epattern form.

#272 Winter Welcome light box

#284 Christmas Blessings

#287 Sammy Snowman

#280 Best Friends Welcome light

#281 Prairie doll welcome light

I have a e-pattern special on this blog only on these patterns only $4.00 each. Remember tomorrow I will be getting chemo, so if you order tomorrow, it maybe tomorrow night before you get your patterns emailed to you.


Our next show is in Oveido, Orlando. Just a few miles from my friend Becky's house. She says it is a big show. Over 350 booths at a school. The best thing it is only one day. I would much rather do the one day shows.

Thursday, August 5, 2010

Finger tutorial and 2 new Patterns


Well I finally got 2 more patterns done, I am trying to get most of the new items finished, because show season starts in less than 2 months. So I need to have everything done.  Here is the first one I finished up. I call this one Winter Magic.  He is a quick and easy project to do.  So simple to make.

Next, I have a lot of request for Prairie dolls, and here is my latest version of one. I call this one Hannah's Christmas tree. She is about 24" long and is holding a prim trim. This one really makes up fast.


I have alot of ladies emailing asking how to stuff those fingers. Love the look, but I hate to stuff fingers. Here is how I do it.


I sew my hand and I use a chopstick and push up the finger back into the hand part.  See picture below


Push each finger back into hand.


When you have all pushed up into hand as shown,


Push your chopstick up into one of the fingers in the middle and gently push the hand up into the arm. You Keep pushing until you reach the opening.  then pull out all the fingers from opening.


then I just use small bits of stuffing and push up into the fingers until you have them all stuffed.


Hope this helps, everyone has their own way of turning and stuffing, but this is best way that works for me.

Sunday, July 18, 2010

Finally a New Pattern


I can't believe how long it has been since I posted on this blog.  But finally got this little dollie finished, she has been sitting there naked for a few weeks.  If you wish to purchase the e-pattern or the mailed version, just click on the link on the side button.  I have to get busy finishing up patterns for this site.  The fall issue of Country Sampler just came out so I am busy making scarecrows for the ad.
Please check out my other new pattern for The Olde Country Cupboard at:  http://oldecountrycupboard.blogspot.com/

Sunday, June 13, 2010

More e-patterns ready from our pattern line


Just wanted to let you know, I have been working on getting some more e-patterns ready from our pattern line. Some of these are our oldies but goodies.  E-pattern special sale on the blog only is $4.00 each for a limited time.

We have I love Gingerbread, Holiday Annie, Angel Annie, and Rusty Scarecrow


Tuesday, May 25, 2010

New 2 free stitchery patterns added


Hi,
I have added 2 more patterns to the free pattern download at the bottom of the page.
These are both stitchery patterns.  One is #306 Children at heart and the other is #111Children are a gift from God.

Monday, May 24, 2010

Booth tips


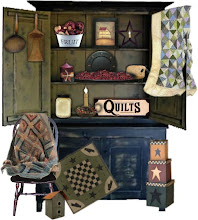
In this post, I am going to show you past show booth pictures, compared to our booth today.  As you will see, we have come a long way.  A lot of hard work to get your booth to look the way you want.  This is what our booth looks like today.  My hubby built it, out of pressure treated lumber, so it is really heavy.
I bought a cupboard to hold my room sprays and a shelf that comes apart.  I use lots of wood crates, rusty buckets and basket sto hold anything on the floor. I now decorate the top of the booth with greenery. Last year I had an old braided rug I threw down. But be sure you tape it down, or you may have an injured customer.
At the Christmas shows, I always have a basket with peppermint candy for anyone to pick up.  Always have business cards to give out.
A big turnoff for me, is to go into a booth, and immediately have the crafter start trying to sell their work to you or not have it priced. I like to look without having someone behind me talking to me the whole time, trying to get me to buy. I usually just walk out without buying when that happens. I am kind of a shy person, I usually just greet my customer and tell them, just ask if you need any help. This works for me, your work will sell itself.


I can't help but laugh, while going through some old photos. I found some of my older shows, now we are talking 20 years ago at least.  I am posting some of the old photos, they are not the best photos, didn't have a decent camera back then.


This one was at an old shopping mall.  I had just the one folded display and a small card table.  Rule number one, never use sheets on a table, use old quilts or good table coverings. I noticed in some of my old pictures, the sheets were blowing could see boxes and sawhorse legs.  Not professional at all.

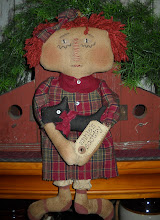
as you can see in this one, overlapping sheets, boxes and table legs showing.  I remember the doing the crochet cotton ornaments that you starch and stiffen.  They on the black display board.  What you can't see on the table are crocheted and wood items.  This booth says Bazaar.


This was one of first big shows at the Morocco Temple shrine auditorium.  This used to be a really good show.  The first year we were in it, we caused a traffic jam and they had to move us to the side room the next year, which worked out great, we had more room, but as you can see here, we did mostly ornaments no extras in our booth for display.


The one and only mall show we ever did. I will never willingly do a mall show again.  They don't come to the mall to buy crafts.  4 long miserable days.  I had a friend with me, who everytime I would sell something, she would take her elbow and elbow me.  A little noticable, she got a little excited about selling, but kind of embarassing, especially when the customer notices.


My booth at the Christmas made in the South Show in Jacksonville, back then we had a single booth. Looking at the picture, we sure didn't have much inventory.  But we also had a crowded booth, and people saying we needed to get a double booth. Now I don't like to have anything but a double booth.


This year I am going to change my booth, my current one is just too heavy for my hubby to handle by himself anymore.  My daughter doesn't get to go with me to all  my shows now.  So it just me and him.  So I have to come up a new prim look, that is a lot easier to handle.  I will share the new booth with you when I get it finished.

Wednesday, May 19, 2010

The Winner of the giveaway is.....

Hi,
thanks to everyone that left a comment.  hubby picked the winning name and it is:
Twin Creeks Primitives.
So please send me your address and I will get this right out to you.

Friday, May 14, 2010

GIVEAWAY TIME AGAIN


Well, time for another giveaway.  This time I am offering my Lil Raggedy's, a Patriotic Anne and Andy.
These little dolls are about 10" tall.  Just leave me a comment, and you must be a member of my blog to enter. I will have hubby draw a name on Wednesday. 


I also got a couple more e-patterns done, the Prim Angel light and Raggedy Bucket.  I am offering these e-patterns at a special price of $4.00 each for this week only.  So click on the side bar buttons to purchase.


    Primitve Angel Light


 #250 Raggedy Bucket

Tuesday, May 11, 2010

HOW TO USE AN IRON TO GET A GRUNGY LOOK ON YOUR FABRIC

Hi,
I get a lot of emails asking how to get that uneven grungy look on stitches and wings.  Here is how I do it.  First off, let me warn you not to use a good iron.  I bought an old iron from a garage sale that I used for this.
I take a spray bottle, and mix  a strong mixture of instant coffee and warm water, shake real good.
Take your piece, I don't even use a stained piece of muslin, just do my stitcheries and wings with unstained muslin.Spray mixture on front of piece and immediately iron with your hot iron.  Just keep ironing until you get it dry.  If you want it darker, just keep spraying and ironing. Repeat for back of wing if desired.  This is a easy way to get a grungy look.


You notice, I used a thick piece of cardboard under my wing piece as I ironed.  This way I can just throw it away and not get my ironing board cover all stained and dirty looking.

Friday, April 23, 2010

New Pattern and Beard Tutorial


Well, finally got another new pattern finished and my tutorial on Santa Beards done.  Here is my newest pattern. I call this one Christmas Cans.  I have a bunch of rusty cans sitting around, never used and wanted something quick and easy to put in them.  The label graphics are included in the pattern.  Click on the side button to purchase.


Here is the way I do my Santa beards,I doing a Santa makedo in this lesson:
Start with head already blushed and stained.


Take a small clump, and using a needle felting needle. Place the beard in the position you want and jab the needle up and down,until beard is secure.


Continue working on one side.


then go to other side and add a piece of beard.


I like to work, going back and forth to each side, to make sure I have it even.


Continue up the side of the heads.


When you get to top of the head, I fold it half and put a part in the middle, I needlefelt the middle of the strip of wool.  It looks like it is parted.


Continue down the side of the head.


Now for moustache, take a clump and find the middle.


And then lay it on the face, where you want the moustache to be and jab up and down with your needle until it is secure.


Now take a small piece for eyebrow, roll it in your fingers until is kind of tight. and place on the head and jab in to place.


now you see the completed head, ready for me to add the eyes.


Once I found the felting needle, I no longer hot glued the beards on. This is much easier.Hope this helps, if you have any questions, just let me know.